file-upload-with-preview
file-upload-with-preview
🖼 Simple file-upload utility that shows a preview of the uploaded image. Written in TypeScript. No dependencies. Works well with or without a framework.


![]()

Links
Install
yarn add file-upload-with-preview
Or, you can include it through the browser.
<link
  rel="stylesheet"
  type="text/css"
  href="https://unpkg.com/file-upload-with-preview/dist/style.css"
/>

<script src="https://unpkg.com/file-upload-with-preview/dist/index.js"></script>
About
This is a simple frontend utility meant to help the file-upload process on your website.
It is written in pure JavaScript using TypeScript and has no dependencies. You can check out the live demo here.
For the most part, browsers do a good job of handling image-uploads. That being said - I find the ability to show our users a preview of their upload can go a long way in increasing the confidence in their upload.
file-upload-with-preview aims to address the issue of showing a preview of a user's uploaded image in a simple to use package.
Features
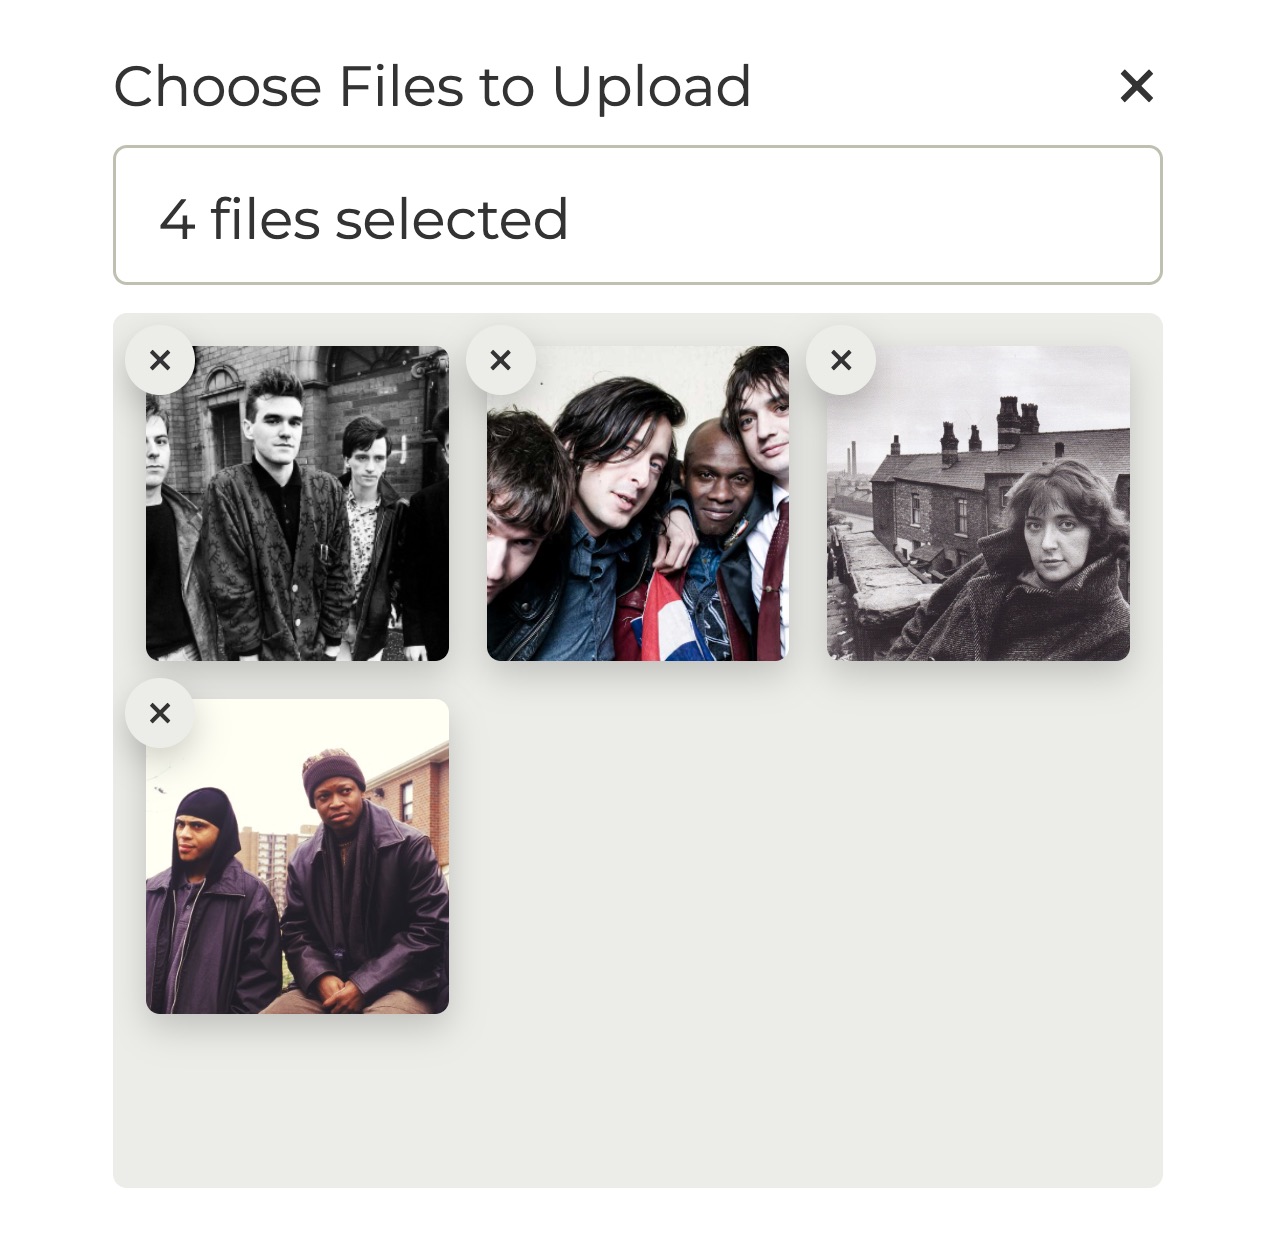
- Shows the actual image preview in the case of a single uploaded .jpg, .jpeg, .gif, or .png image. Shows a success-image in the case of an uploaded .pdf file, uploaded video, or other un-renderable file - so the user knows their image was collected successfully. In the case of multiple selected files, the user's selected images will be shown in a grid.
- Shows the image name in the input bar. Shows the count of selected images in the case of multiple selections within the same input.
- Allows the user to clear their upload and clear individual images in the
multiplegrid - Looks great
- Framework agnostic - to access the uploaded file/files just use the
cachedFileArray(always will be an array) property of yourFileUploadWithPreviewobject. - For every file-group you want just initialize another
FileUploadWithPreviewobject with its ownuniqueId- this way you can have multiple file-uploads on the same page. You also can just use a single input designated with amultipleproperty to allow multiple files on the same input.
Usage
This library looks for a specific HTML element to display the file-upload. Simply add the below div to your HTML. Make sure to populate your unique id in the data-upload-id attribute.
<div class="custom-file-container" data-upload-id="my-unique-id"></div>
Then, initialize your file-upload in the JavaScript like below:
import { FileUploadWithPreview } from 'file-upload-with-preview';
import 'file-upload-with-preview/dist/style.css';

const upload = new FileUploadWithPreview('my-unique-id');
Usage with Next.js / Tailwind :
'use client';
import { useEffect } from 'react';
import { FileUploadWithPreview } from 'file-upload-with-preview';
import 'file-upload-with-preview/dist/style.css';

export default function Uploader() {
  useEffect(() => {
    const upload = new FileUploadWithPreview('my-unique-id');
  }, []);

  return <div className="custom-file-container" data-upload-id="my-unique-id"></div>;
}
If you're importing directly in the browser, use the following instead:
<!DOCTYPE html>
<html>
  <head>
    <meta charset="UTF-8" />
    <link
      rel="stylesheet"
      type="text/css"
      href="https://unpkg.com/file-upload-with-preview/dist/style.css"
    />
  </head>
  <body>
    <div class="custom-file-container" data-upload-id="my-unique-id"></div>
    <script src="https://unpkg.com/file-upload-with-preview/dist/index.js"></script>
  </body>
</html>
Then initialize like this:
const upload = new FileUploadWithPreview.FileUploadWithPreview('my-unique-id');
Then when you're ready to use the user's file for an API call or whatever, just access the user's uploaded file/files in the cachedFileArray property of your initialized object like this:
upload.cachedFileArray;
You can optionally trigger the image browser and clear selected images programmatically. There are additional methods on the class if you'd like to take a look at the source code.
upload.emulateInputSelection(); // to open image browser
upload.resetPreviewPanel(); // clear all selected images
You may also want to capture the event when an image is selected.
import { Events, ImageAddedEvent } from 'file-upload-with-preview';

window.addEventListener(Events.IMAGE_ADDED, (e: Event) => {
  const { detail } = e as unknown as ImageAddedEvent;

  console.log('detail', detail);
});
Note
The cachedFileArray property is always an array. So if you are only allowing the user to upload a single file, you can access that file at cachedFileArray[0] - otherwise just send the entire array to your backend to handle it normally.
Make sure to pass in multiple: true in your options if you want to allow the user to select multiple images.
Docs
View the full docs here.
Full Example
See the full example in the ./example/index.ts folder. See the top of this README for some links to a few live CodeSandbox's.
Browser Support
If you are supporting a browser like IE11, one way to add a polyfill for fetch and promise is by adding the following in the bottom of your index.html:
<script src="https://cdn.jsdelivr.net/npm/es6-promise@4/dist/es6-promise.auto.js"></script>
<script src="https://cdnjs.cloudflare.com/ajax/libs/fetch/2.0.3/fetch.js"></script>
Development
# Install dependencies
yarn

# Watch changes during local development
yarn dev

# Run tests
yarn test

# Build library
yarn build
Other
Go ahead and fork the project! Submit an issue if needed. Have fun!